This Quickstart will walk you through how to get Cello integrated in 4 easy steps. It is optimized for the typical freemium scenario using Stripe as the integration path. But if you're using a different stack, don't worry - this guide will still provide you with a comprehensive overview of the essential steps needed to get Cello integrated into your system and references to alternative integration methods like Chargebee Quickstart and other payment gateways.
By the end of this section, you'll have Cello implemented end-to-end including:
- Referrer experience with Cello Referral component
- New user experience
- Pre-signup and tracking
- Signup tracking
- Referral data sharing with Cello
Lets get started 🚀
0. Sign in to Cello
Go to Cello Portal and login to access your product dashboard.
1. Start by adding the Referral component
Before you begin, you need:
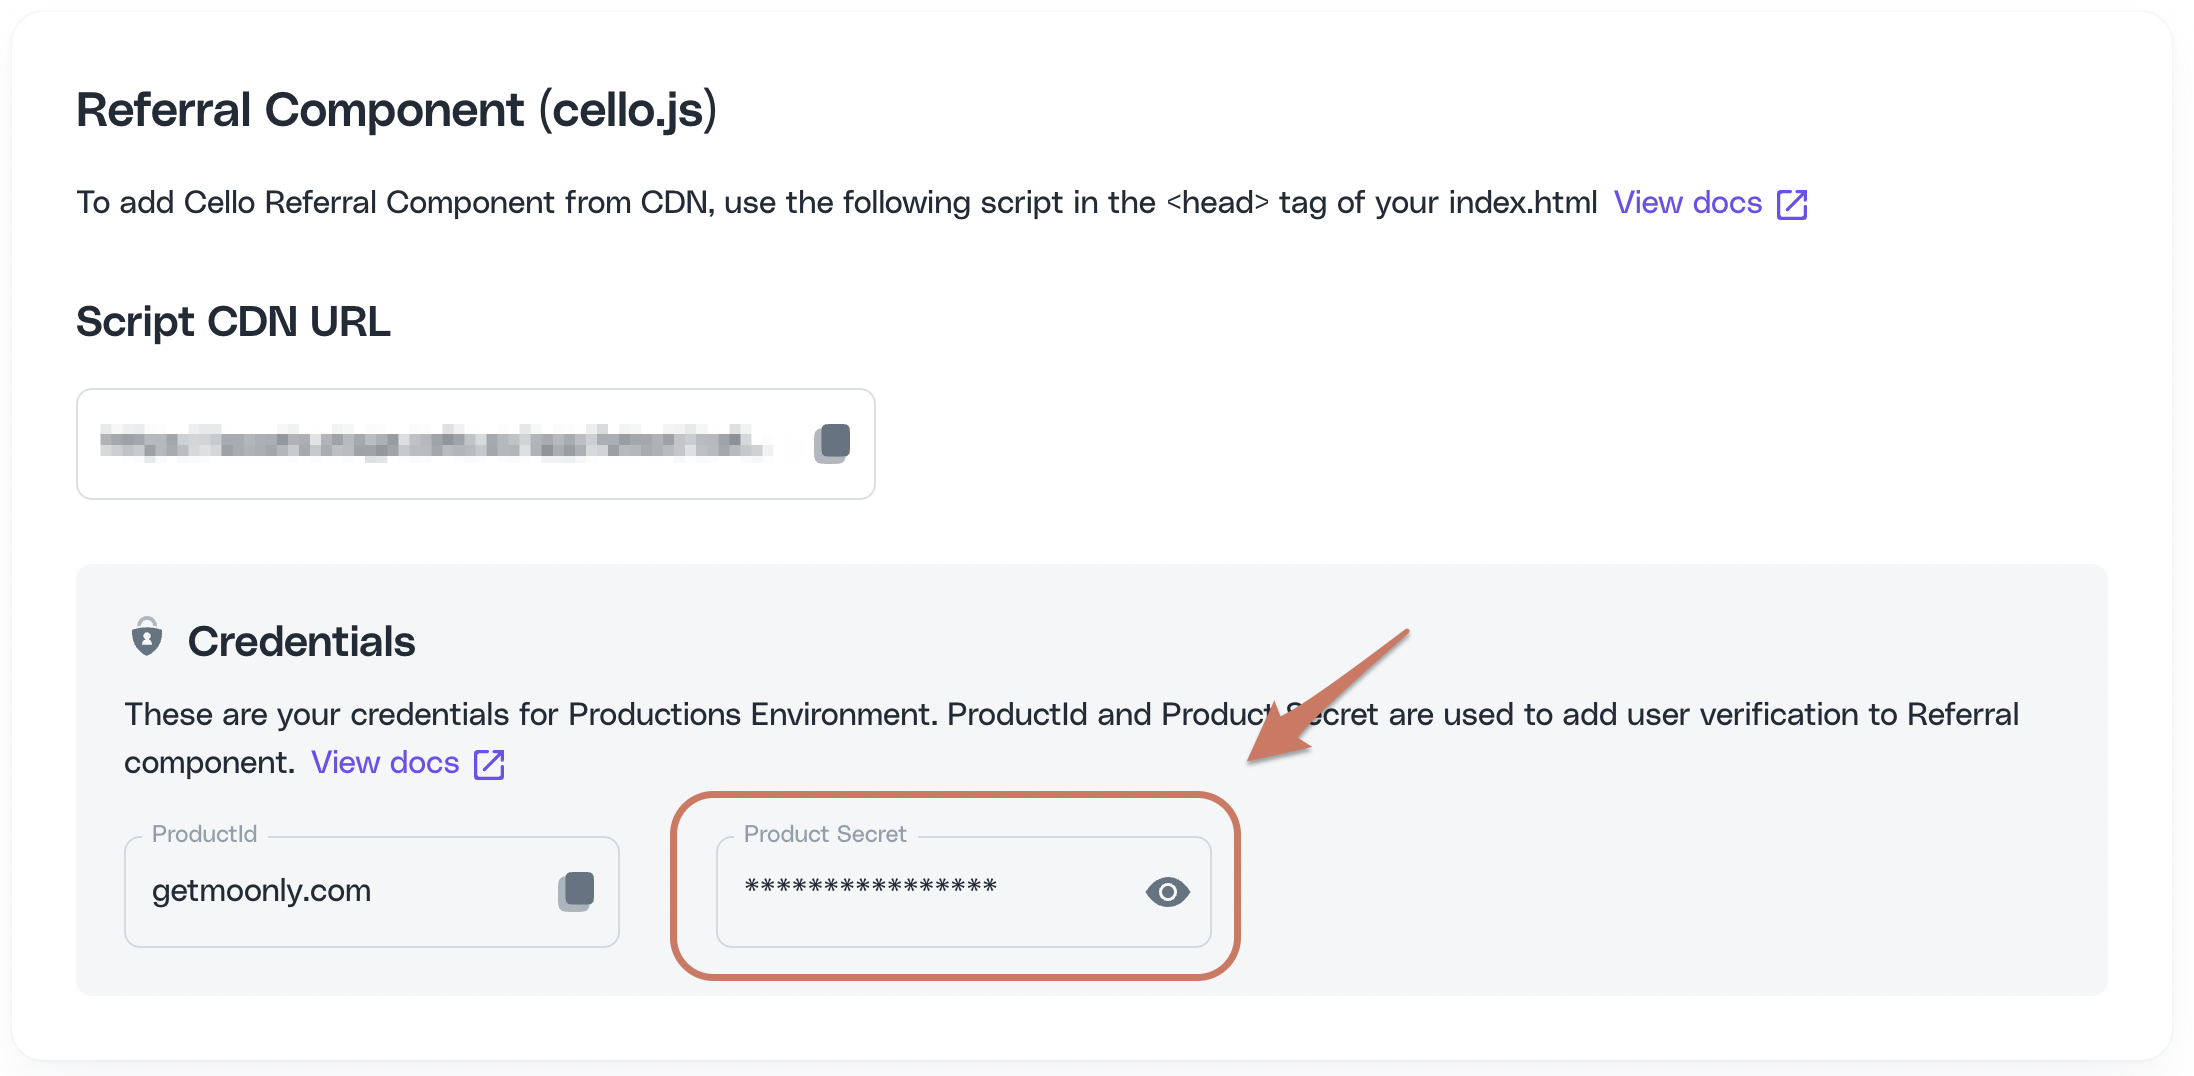
- Product ID (
productId) - Identifier of the product your users will refer. You can access it in you product dashboard on Access Keys page.
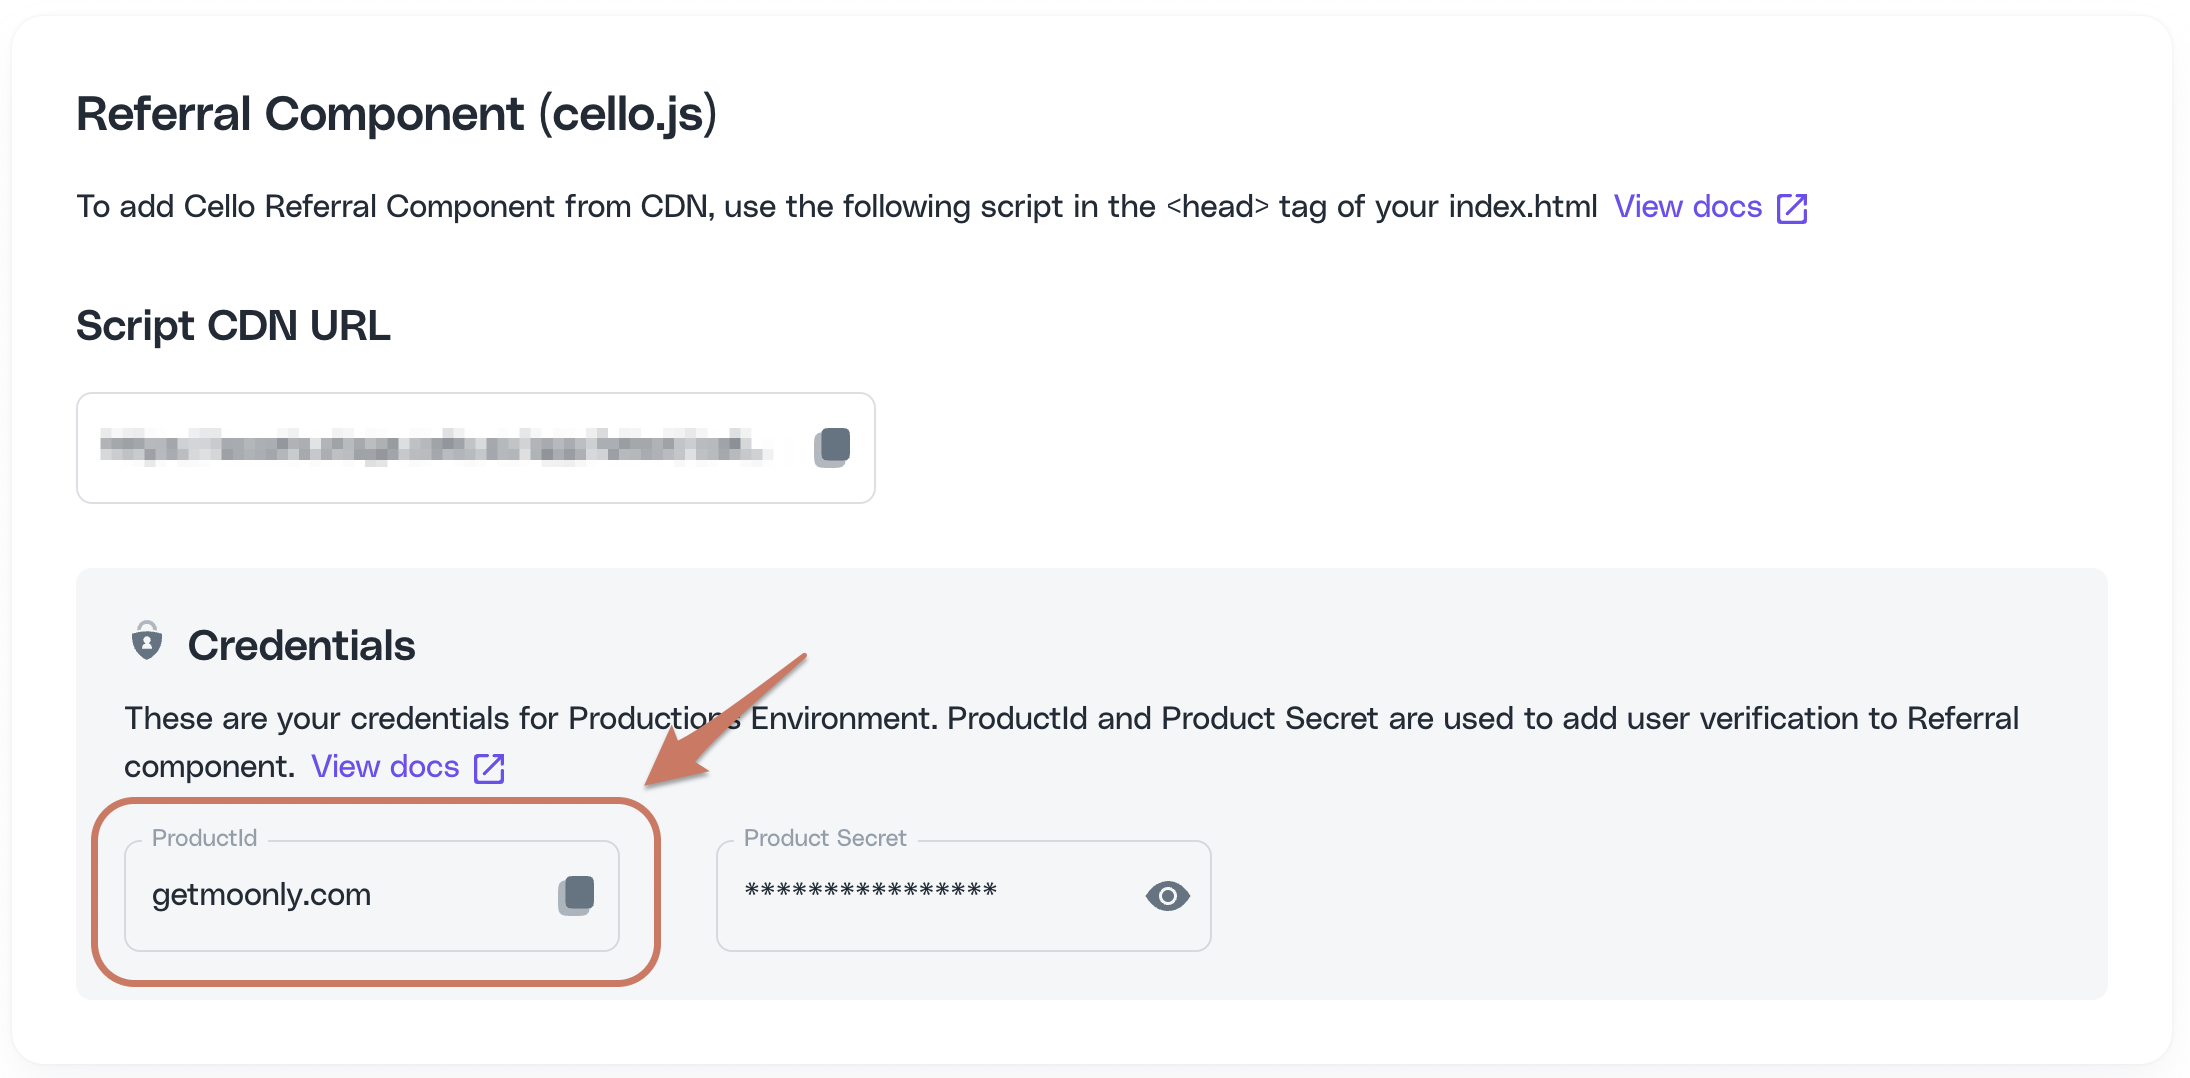
- Product User ID (
productUserId) - The unique identifier for your users - Product Secret (
PRODUCT_SECRET) - Provided in section 4 of your onboarding workspace
Include Cello JS library
To add Cello Referral Component from CDN, use the following script in the head tag of your index.html
xxxxxxxxxx<script type="module" src="https://assets.sandbox.cello.so/app/v2/latest/cello.js" async></script>Add user authentication with JWT token
Generate a JWT token
Never generate a token or store your secret on the client side
xxxxxxxxxximport { sign } from 'jsonwebtoken'; const SECRET = 'PRODUCT_SECRET'; // your PRODUCT_SECRET const tokenPayload = { productId: 'YOUR_PRODUCT_ID', // your productId productUserId: 'CURRENT_USER_ID', // your user unique identifier}; const token = sign(tokenPayload, SECRET, { algorithm: 'HS512',}); console.log(token);Initialize the Referral component
Now, we can initialize the Referral component with the JWT token we just generated
xxxxxxxxxxwindow.cello = window.cello || { cmd: [] }; window.cello.cmd.push(function (cello) { cello.boot({ productId: 'CELLO_PRODUCT_ID', token: 'REPLACE_ME', language: "en", productUserDetails: { firstName:'Bob', lastName:'Bobsky', fullName:'Bob B Bobsky', email: 'bob@gmail.com' } } });});Now, reload your application and you should see the Cello button appear. You can now try out the referrer experience.
Before rolling this out to production, make sure to fully implement user authentication, including token update and Referral component shutdown on user logoff.
Let's move on to new user experience and referral tracking 👉
2. Add the attribution library
Attribution Library will provide a new user with a personalized experience and facilitate leads and sign-up tracking.
Attribution Library is added to your referral landing page and will:
- Read the unique campaign code (
ucc) from the URL parameters and store it in a cookie - Attach the unique campaign code (
ucc) to sign up form - Display a personal message to the user landing on the referral page from the share link (optional)
To include the Attribution Library, place this code snippet on your referral landing page in the <head> tag:
xxxxxxxxxx<script type="module" src="https://assets.cello.so/attribution/latest/cello-attribution.js" async></script>Now, whenever a new user visits your referral landing page from a share link, a cookie with the UCC will be stored to keep track of return visits, a personal message will be displayed (if enabled), and the UCC can be attached to the signup form, which we are going to take care of in the next step.
3. Start tracking signups with Stripe
If you are using Stripe, the easiest way to start tracking signups is to create a Stripe customer right when a new user signs up and add the ucc and productUserId to customer metadata. This will trigger a Stripe event to Cello after you have implemented the Stripe Webhook in step 4.
Use Stripe.js to modify customer fields you send upon customer creation:
- cello_ucc - ucc, a referral code identifying the referrer
- new_user_id - a unique user ID in your system, identifying the new user who just signed up. This should be the same ID (productUserId) you will use to boot the Referral component, when this user logs into your app
- new_user_organization_id (optional) - add this, if your referrers can refer an organization rather then a single user and you want to reward based on that.
💡 In this step, we also recommend adding the new user discount field (coupon), so when the customer later subscribes and the subscription is created in Stripe, the discount will be applied automatically. More information on how to grant discounts in Stripe can be found in this guide.
Here is an example for a NodeJS App:
xxxxxxxxxxconst stripe = require('stripe')('sk_test_51KiCYYCSMQAUBF...'); const customer = await stripe.customers.create({ description: 'New Stripe Customer', coupon: 'lHTYr6Y9', metadata: { cello_ucc: "hdz7afhs7", new_user_id: "xcsdad", // product user id of the new user new_user_organization_id: "123456" // organization id of the new user }});Alternatively, here are the steps for Chargebee as well as other options to track signups in Attribution Overview.
Now, the final step - sending tracking data to Cello 👉
4. Share data with Cello using the Stripe Webhook
Cello makes it easy to connect securely to your Stripe payment provider to automate transaction events, attribution, and payouts. Transactions are monitored and used to pay out referrers based on your campaign reward rules. A notification event is securely sent to Cello through the webhook endpoint every time a customer makes a payment or a customer record is created or updated.
Add a webhook in 2 easy steps:
Adding Cello webhook
- Select Webhooks from the left menu and select Add an endpoint
- Enter the provided Endpoint URL based on the environment. Cello Endpoint URL is available for both test and production environments. You can get Endpoint URL in you product dashboard on Webhooks page.
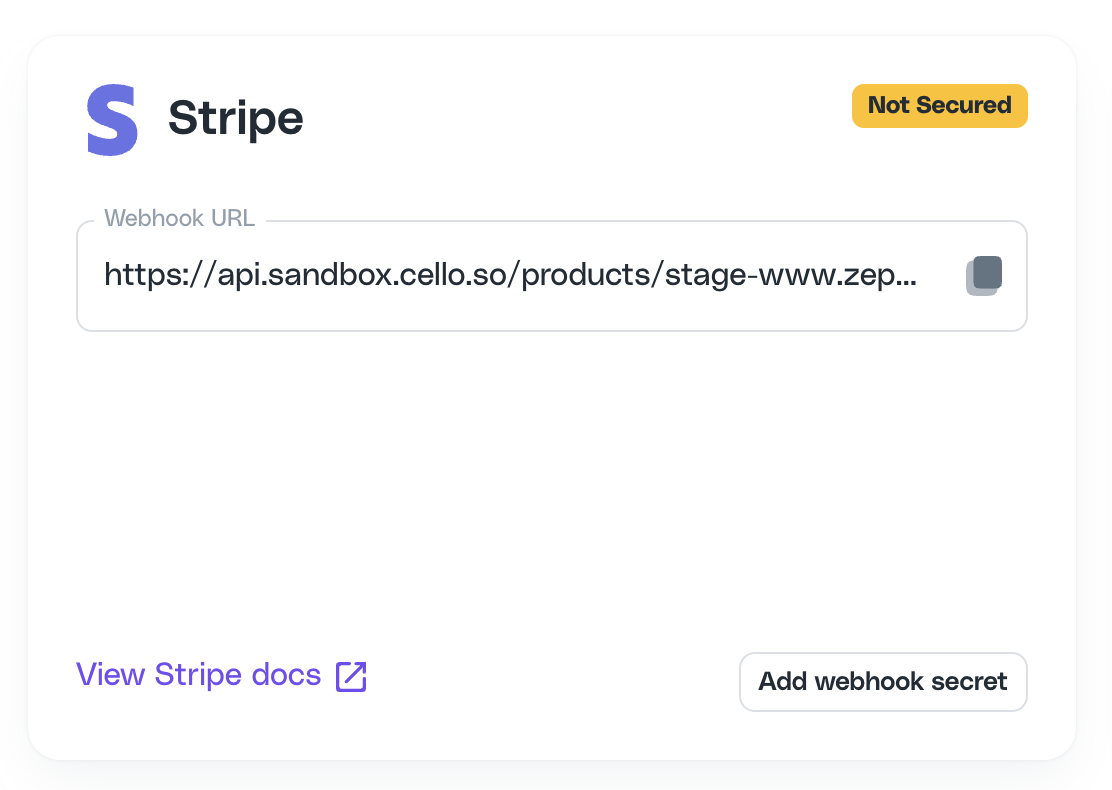
- Select the events:
charge.refunded,charge.succeeded,charge.updated,customer.created,customer.deleted,customer.updated,customer.subscription.created,customer.subscription.deleted,customer.subscription.updated,invoice.paid - Endpoint created 🎉
Securing the webhook connection
To secure the connection, follow the next steps:
- Get Signing secret from Stripe dashboard - go to the webhook you added and click Reveal under the Signing secret
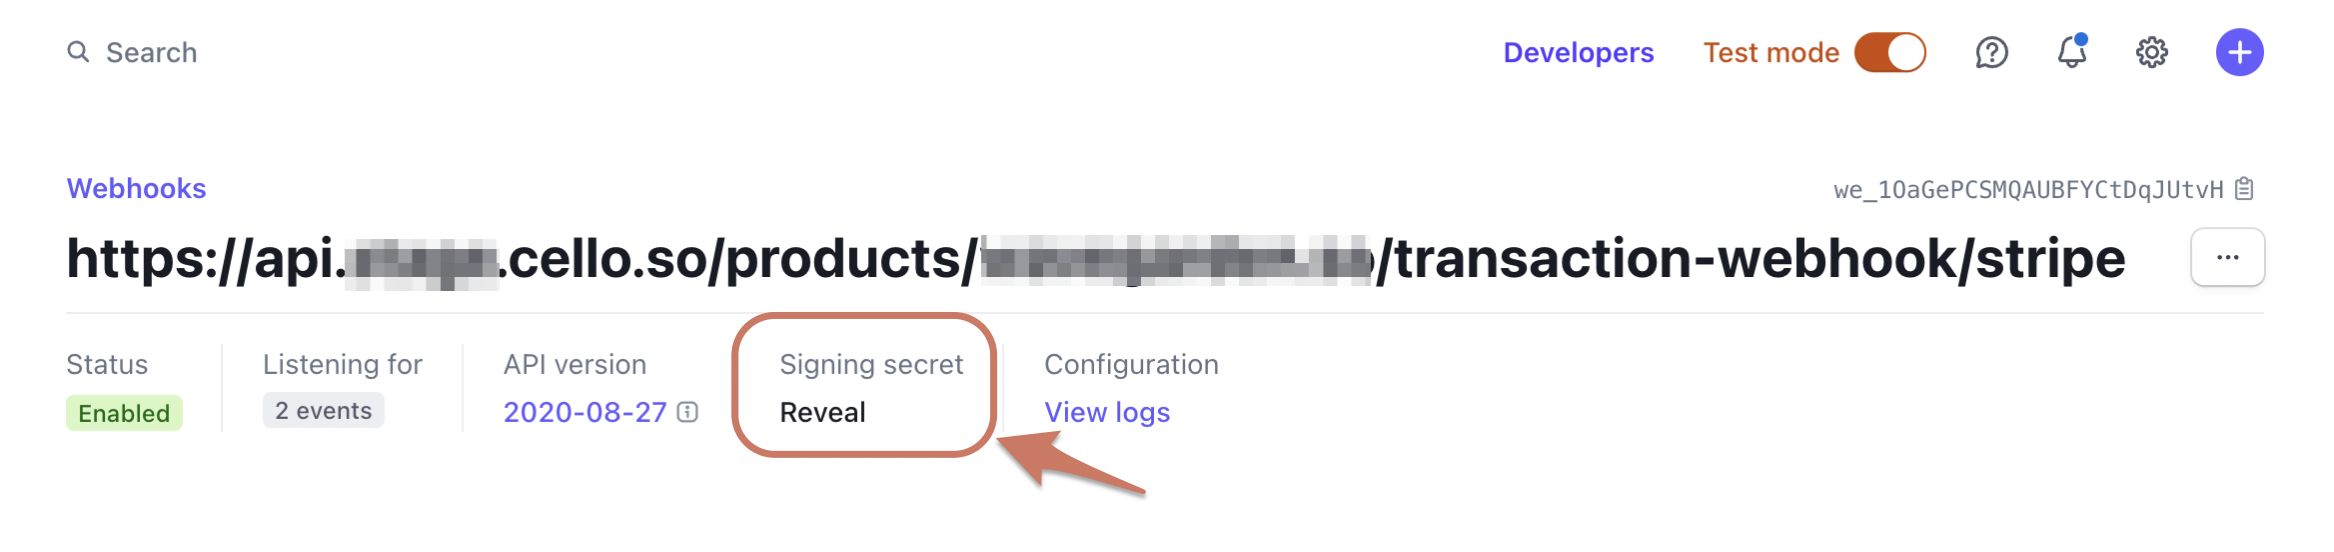
- Copy the secret - copy the whole secret together with
whsec_prefix

- Add Signing secret to Cello Stripe webhook integration - got to Webhooks page, click on Add webhook secret, paste in your Stripe Signing secret and save.
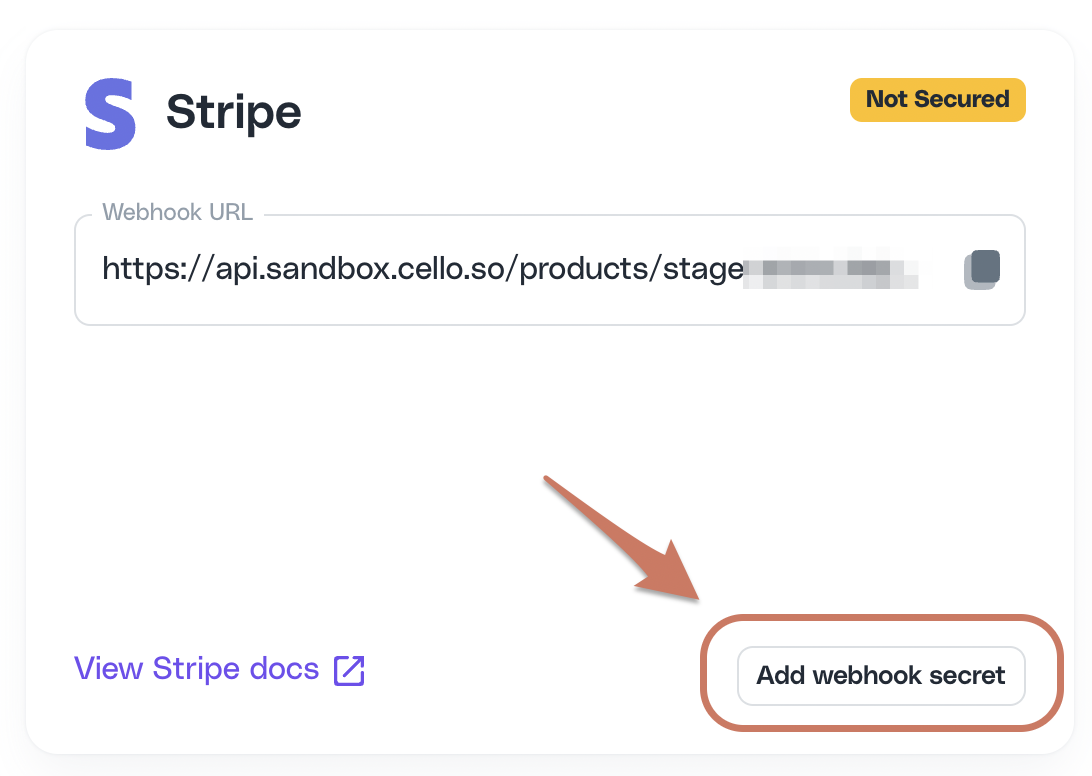
Webhook is now secured 🎉
Alternatively, you can use Chargebee or Cello API to share data with Cello.
Congratulations! You are done and now able to try out the full Cello referral experience 🎉