

The Cello SDK for Android enables you to add a referral program into your iOS app. With a plug-n-play mobile component, your users can easily share their invite link with their friends and network using mobile sharing options convenient for them, receive rewards and get paid out.
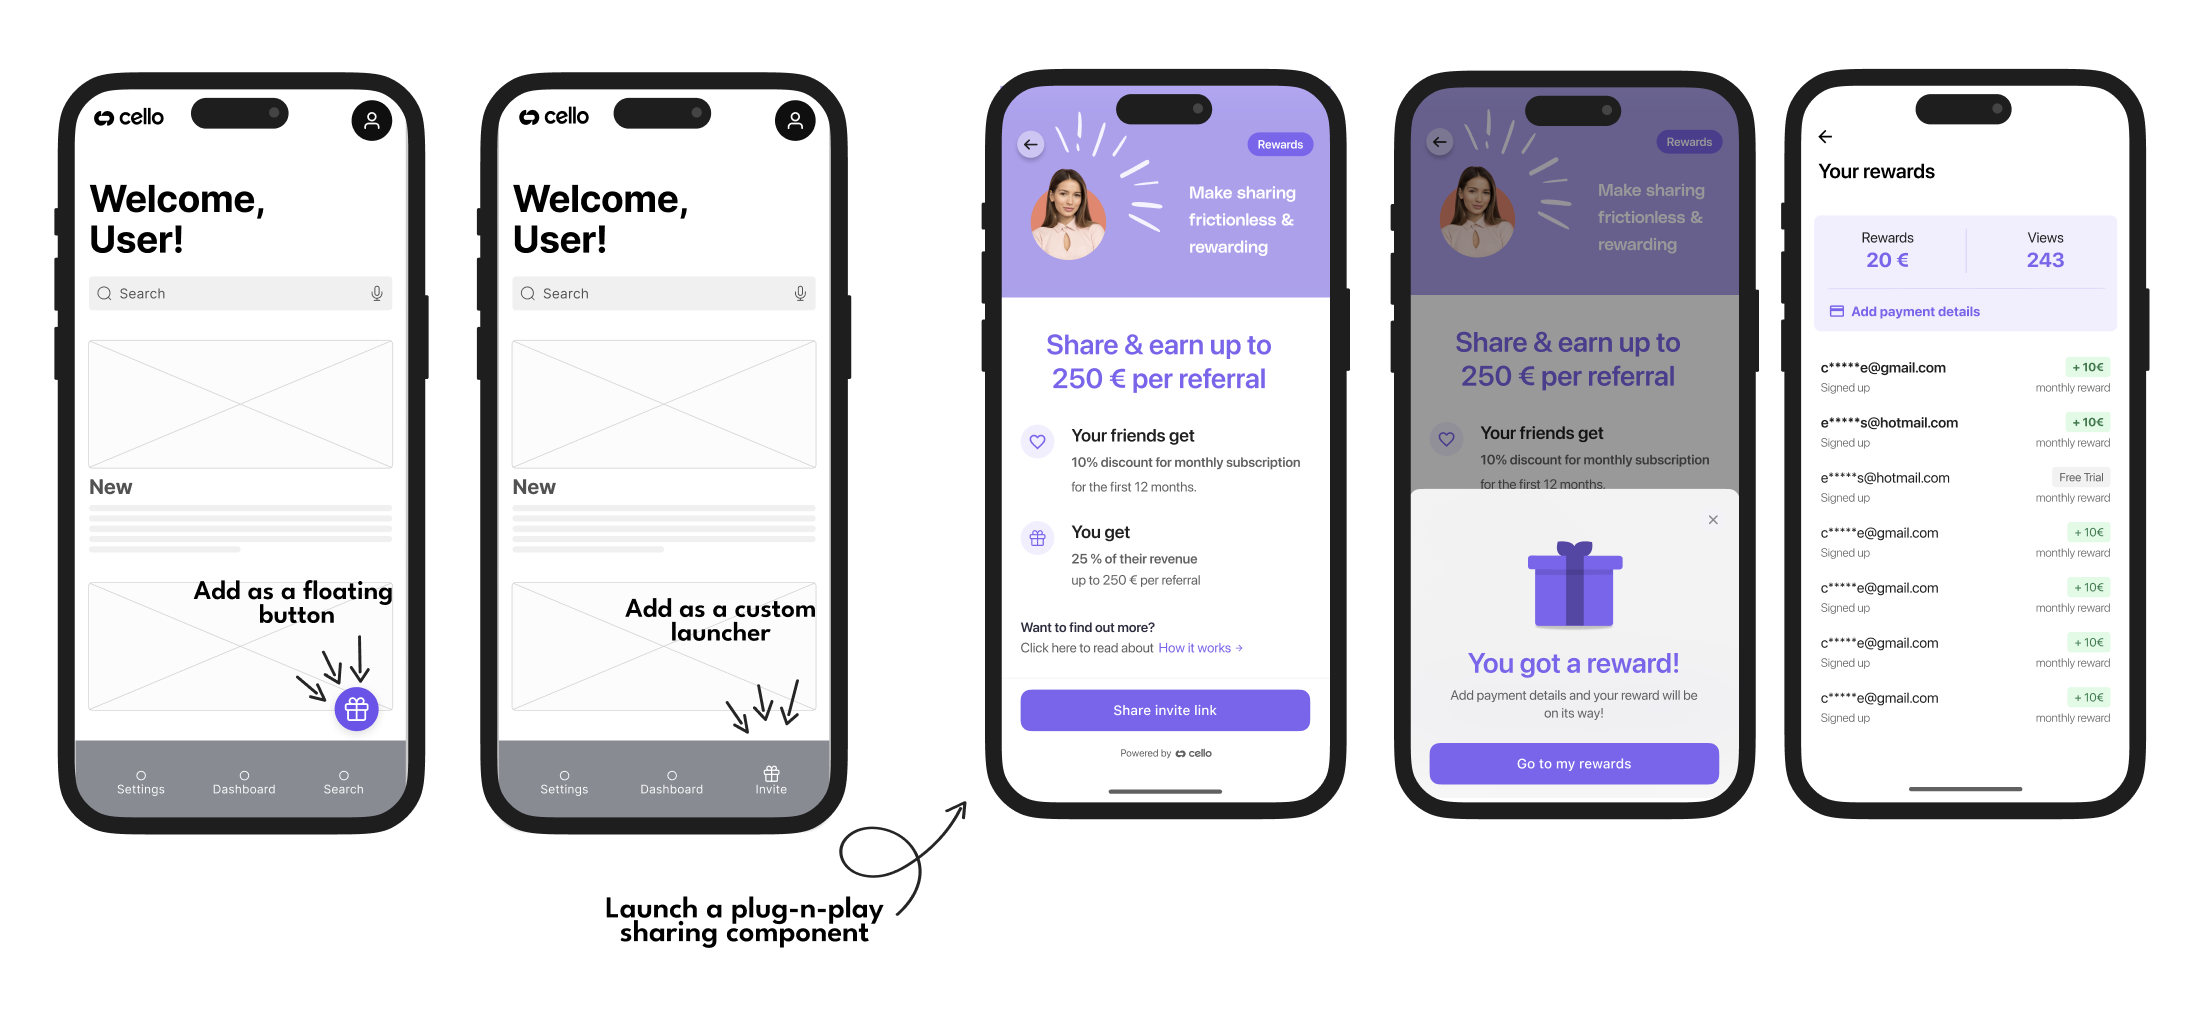
You can customize the Referral component in the following ways:
Launcher – Use the default button or implement a custom launcher to open the Referral component.
Hero Image – Set a custom image for the sharing screen.
Copy – Customize the text displayed in the component.
Brand Color – Apply your brand’s primary color to match your app’s style.
Notification images - Choose which image is displayed in the new view and new reward notification.
Installation
You can install Cello for Android using Gradle or manually. A basic installation takes around 15 minutes but will take a little longer if you want to customize the way the Cello Referral Component is launched.
Compatibility
Cello SDK for Android is compatible with API 21 and up.
SDK size
The size of Cello for Android once installed varies depending on your app’s configuration. Around 7MB is the average size increase we would expect to see if you're minifying your app correctly.
Setup
Install Cello to see and give your users the option to spread the word from your iOS app. Cello for Android supports API 21 and above.
Note: We recommend using the latest available compileSdkVersion.
Install Cello
Add the following dependency to your app's build.gradle file:
Maven Central
Cello is hosted on maven central. You will need to add maven central to your root build.gradle file.
Choose an Environment
In your Cello SDK setup, you have the flexibility to select the environment in which your application will run. This feature is especially useful for different stages of development, such as testing in a development or staging environment before going live in production. The available environments are:
prod(Production)sandbox(Sandbox)
By default, the SDK is set to the prod environment.
Configuration Steps
Navigate to the
res/valuesdirectory in your Android project.Open or create the
config.xmlfile.Add or update the
<string>element with the namecello_envto set your desired environment. Here is an example setting the environment to production:
To change the environment, simply replace the value of
cello_env. For instance, to set the environment to sandbox:
Save your changes and rebuild your project to ensure the new configuration is applied.
Using this configuration, the Cello SDK will adapt to the specified environment, allowing for more controlled development and testing processes.
Initialize Cello
In this step, you will need your product ID and a token you have generated for the user, similar when implementing the web based Referral component.
Then, initialize Cello by calling the following in the onCreate() method of your application class:
Note: If you don't currently implement a custom application, you’ll need to create one. A custom application looks like this:
Note: Cello SDK must be initialized inside the application onCreate() method. Initializing anywhere else will result in the SDK not behaving as expected and could even result in the host app crashing.
Customize the Cello Referral component
The Cello SDK allows for various levels of customization to better fit into your app's design and flow. One of the main components you might want to customize is the Referral component
Choose your launcher
The SDK provides two ways to launch the Referral component:
Default launcher
If you choose to go with the default launcher, you can call the showFab() method from the Cello SDK to present a Floating Action Button (FAB) within your app. This FAB is pre-styled but may not perfectly match your app's look and feel.
Custom launcher
If the default launcher does not fit your needs, you can implement your own custom launcher. This could be any UI element like a button, menu item, or even a gesture. To open the Referral component using a custom launcher, you can call Cello.openWidget().
Android API
Cello.initialize()
Initializes the Cello Referral Component in your product
Name | Type | Description | Required |
|---|---|---|---|
activity | Activity | This is the reference to the MainActivity | Yes |
productId | string | Identifier of the product your users will refer. It can be found in your Cello Portal. | Yes |
token | string | Access token generated for the given user. | Yes |
Cello.updateToken()
Updates the token and also verifies it.
Name | Type | Description | Required |
|---|---|---|---|
token | string | Access token generated for the given user. | Yes |
Cello.showFab()
Shows the Floating action button or bookmark that launches the Referral Component
Cello.hideFab()
Hides the Floating action button or bookmark that launches the Referral Component
Cello.openWidget()
Opens Referral Component
Cello.hideWidget()
Hides Referral Component
Cello.getActiveUcc()
A method to get an active ucc and invite link for the currently logged in user.
Cello.changeLanguage()
A method to change the language of the Referral component at runtime without re-initialising it.
Cello.shutdown()
Shuts down connection to Cello and unmounts the component